
Fuzzy Skin Settings Chart
| Point Distance | Thickness 0.1 | Thickness 0.2 | Thickness 0.3 |
|---|---|---|---|
| 0.1 | #1 | #2 | #3 |
| 0.2 | #4 | #5 | #6 |
| 0.3 | #7 | #8 | #9 |
| 0.4 | #10 | #11 | #12 |
| 0.5 | #13 | #14 | #15 |
| 0.6 | #16 | #17 | #18 |
| 0.7 | #19 | #20 | #21 |
| 0.8 | #22 | #23 | #24 |
Sample Fuzzy Skin Results

Part #0: Point Distance: 0.0, Thickness: 0.0
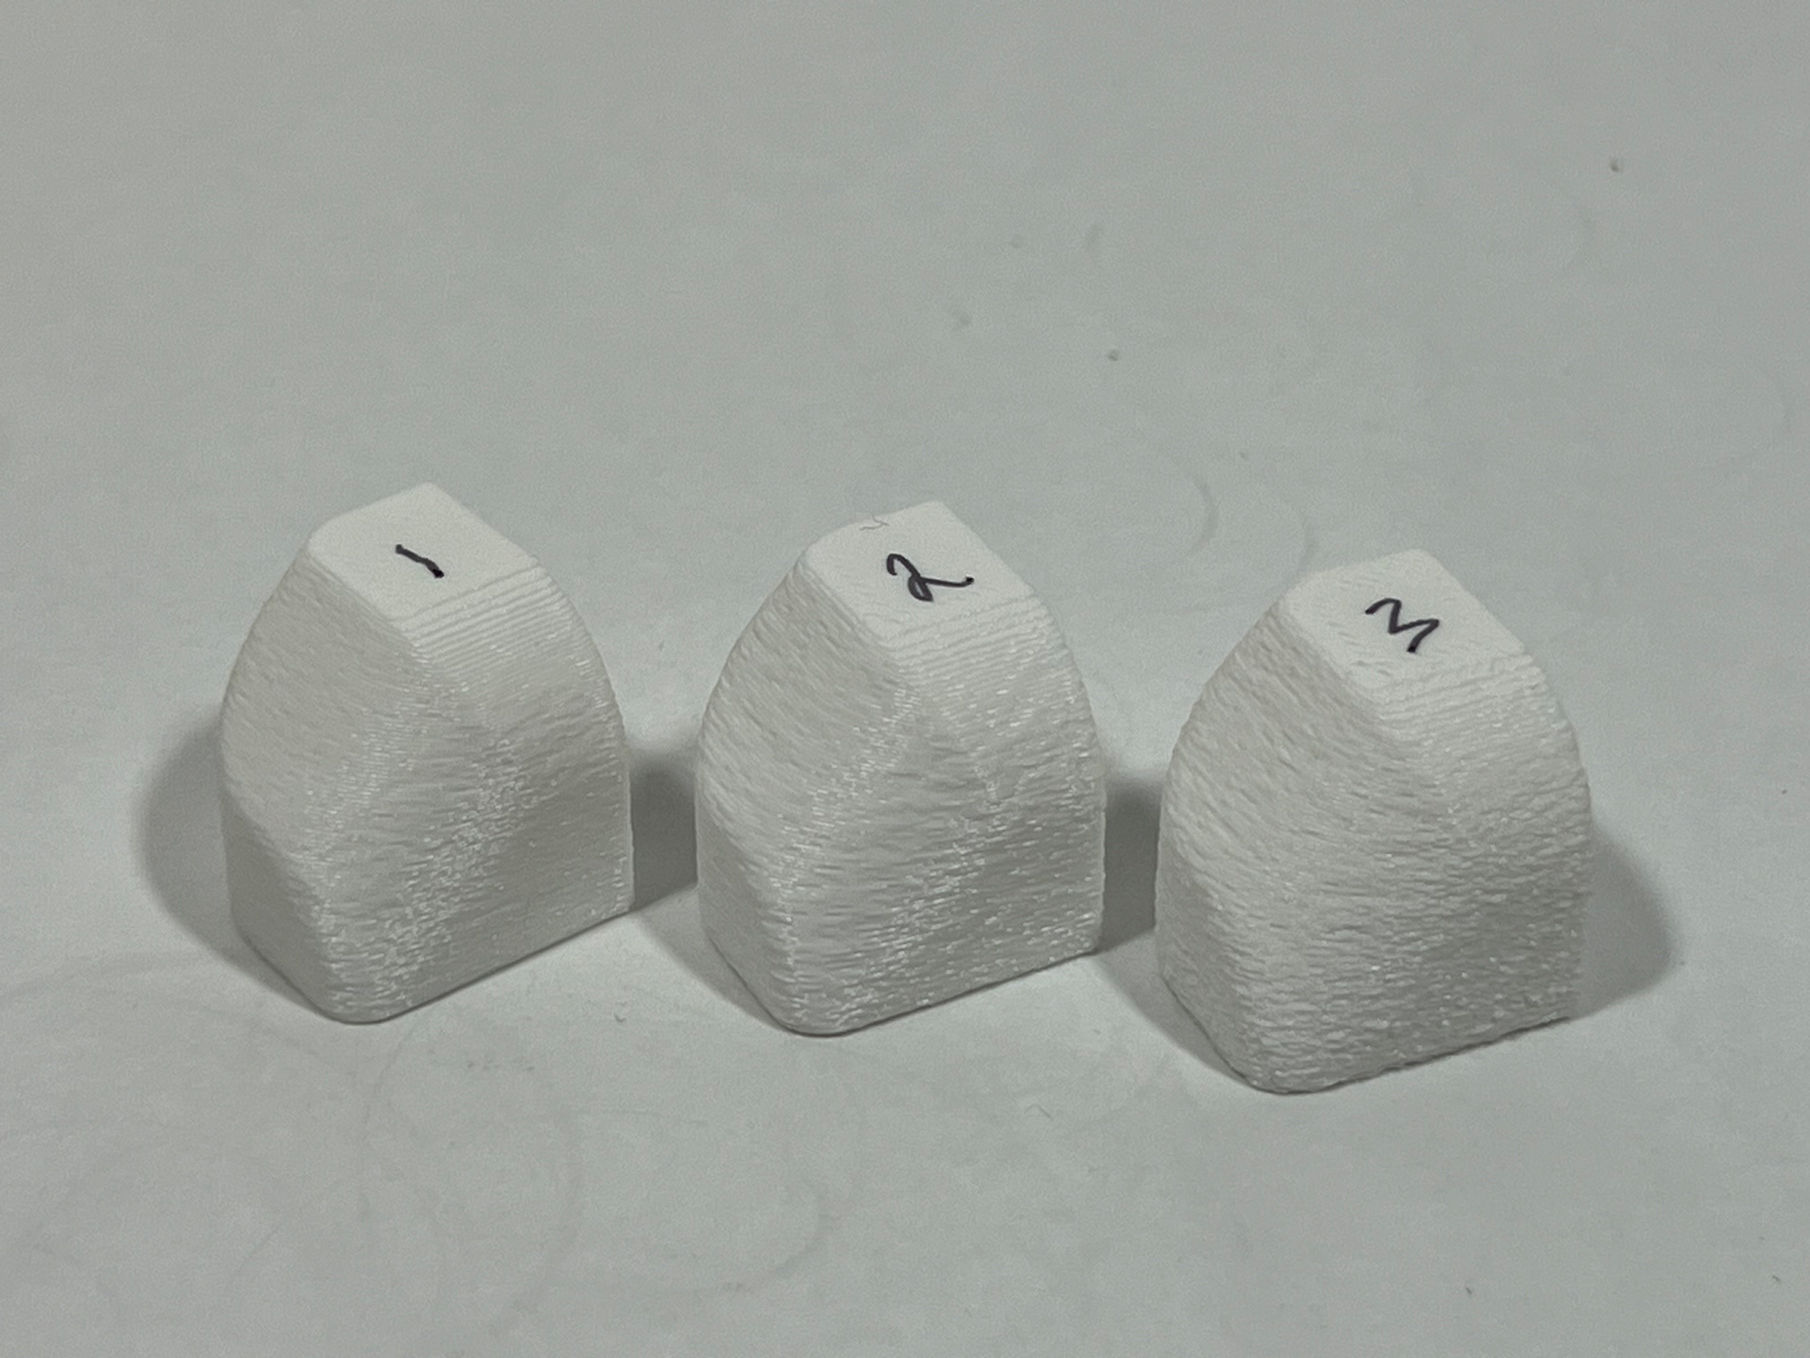
Part #1: Point Distance: 0.1, Thickness: 0.1
Part #2: Point Distance: 0.1, Thickness: 0.2
Part #3: Point Distance: 0.1, Thickness: 0.3
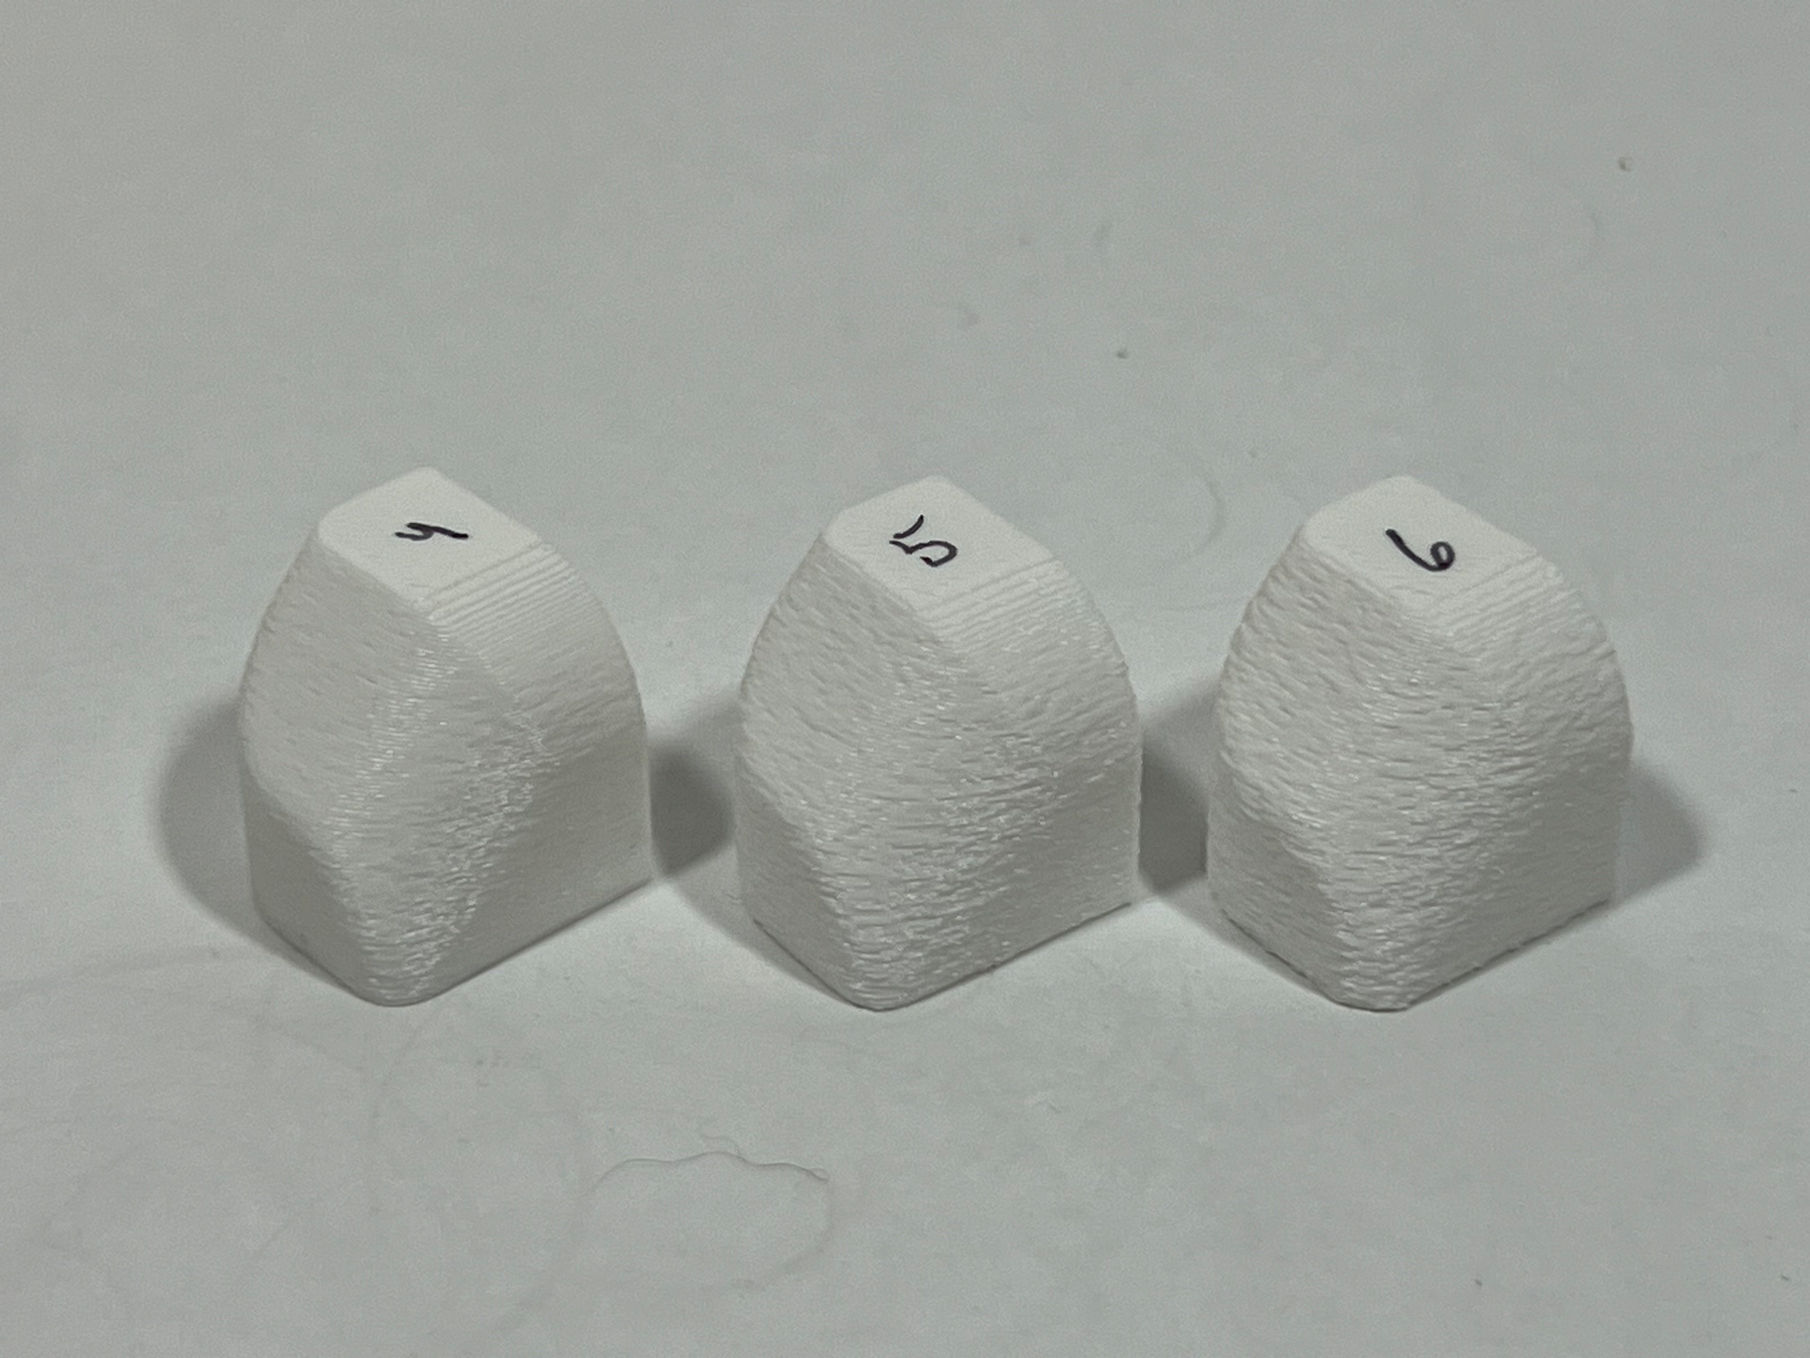
Part #4: Point Distance: 0.2, Thickness: 0.1
Part #5: Point Distance: 0.2, Thickness: 0.2
Part #6: Point Distance: 0.2, Thickness: 0.3

Part #7: Point Distance: 0.3, Thickness: 0.1
Part #8: Point Distance: 0.3, Thickness: 0.2
Part #9: Point Distance: 0.3, Thickness: 0.3
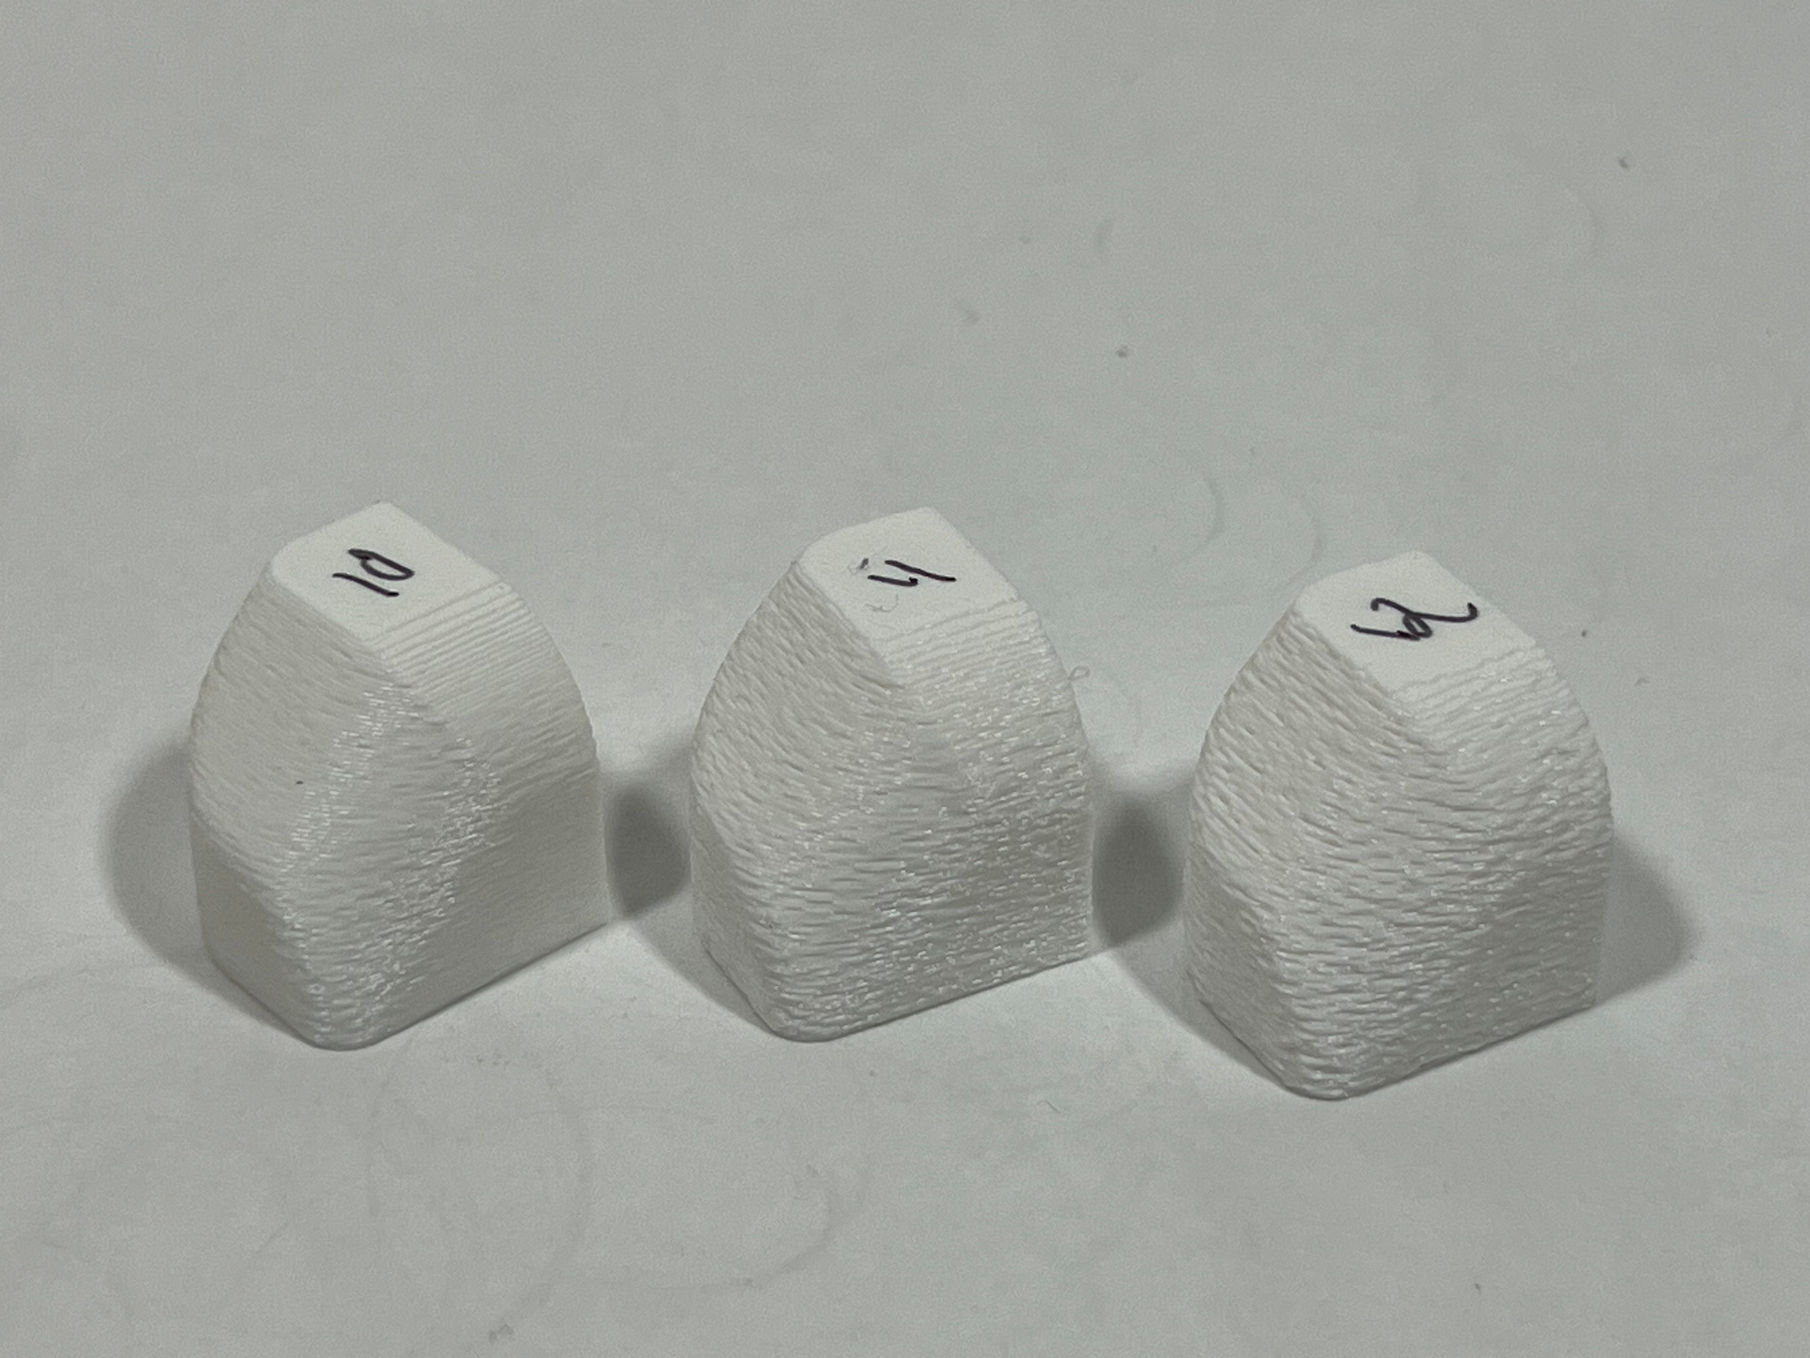
Part #10: Point Distance: 0.4, Thickness: 0.1
Part #11: Point Distance: 0.4, Thickness: 0.2
Part #12: Point Distance: 0.4, Thickness: 0.3
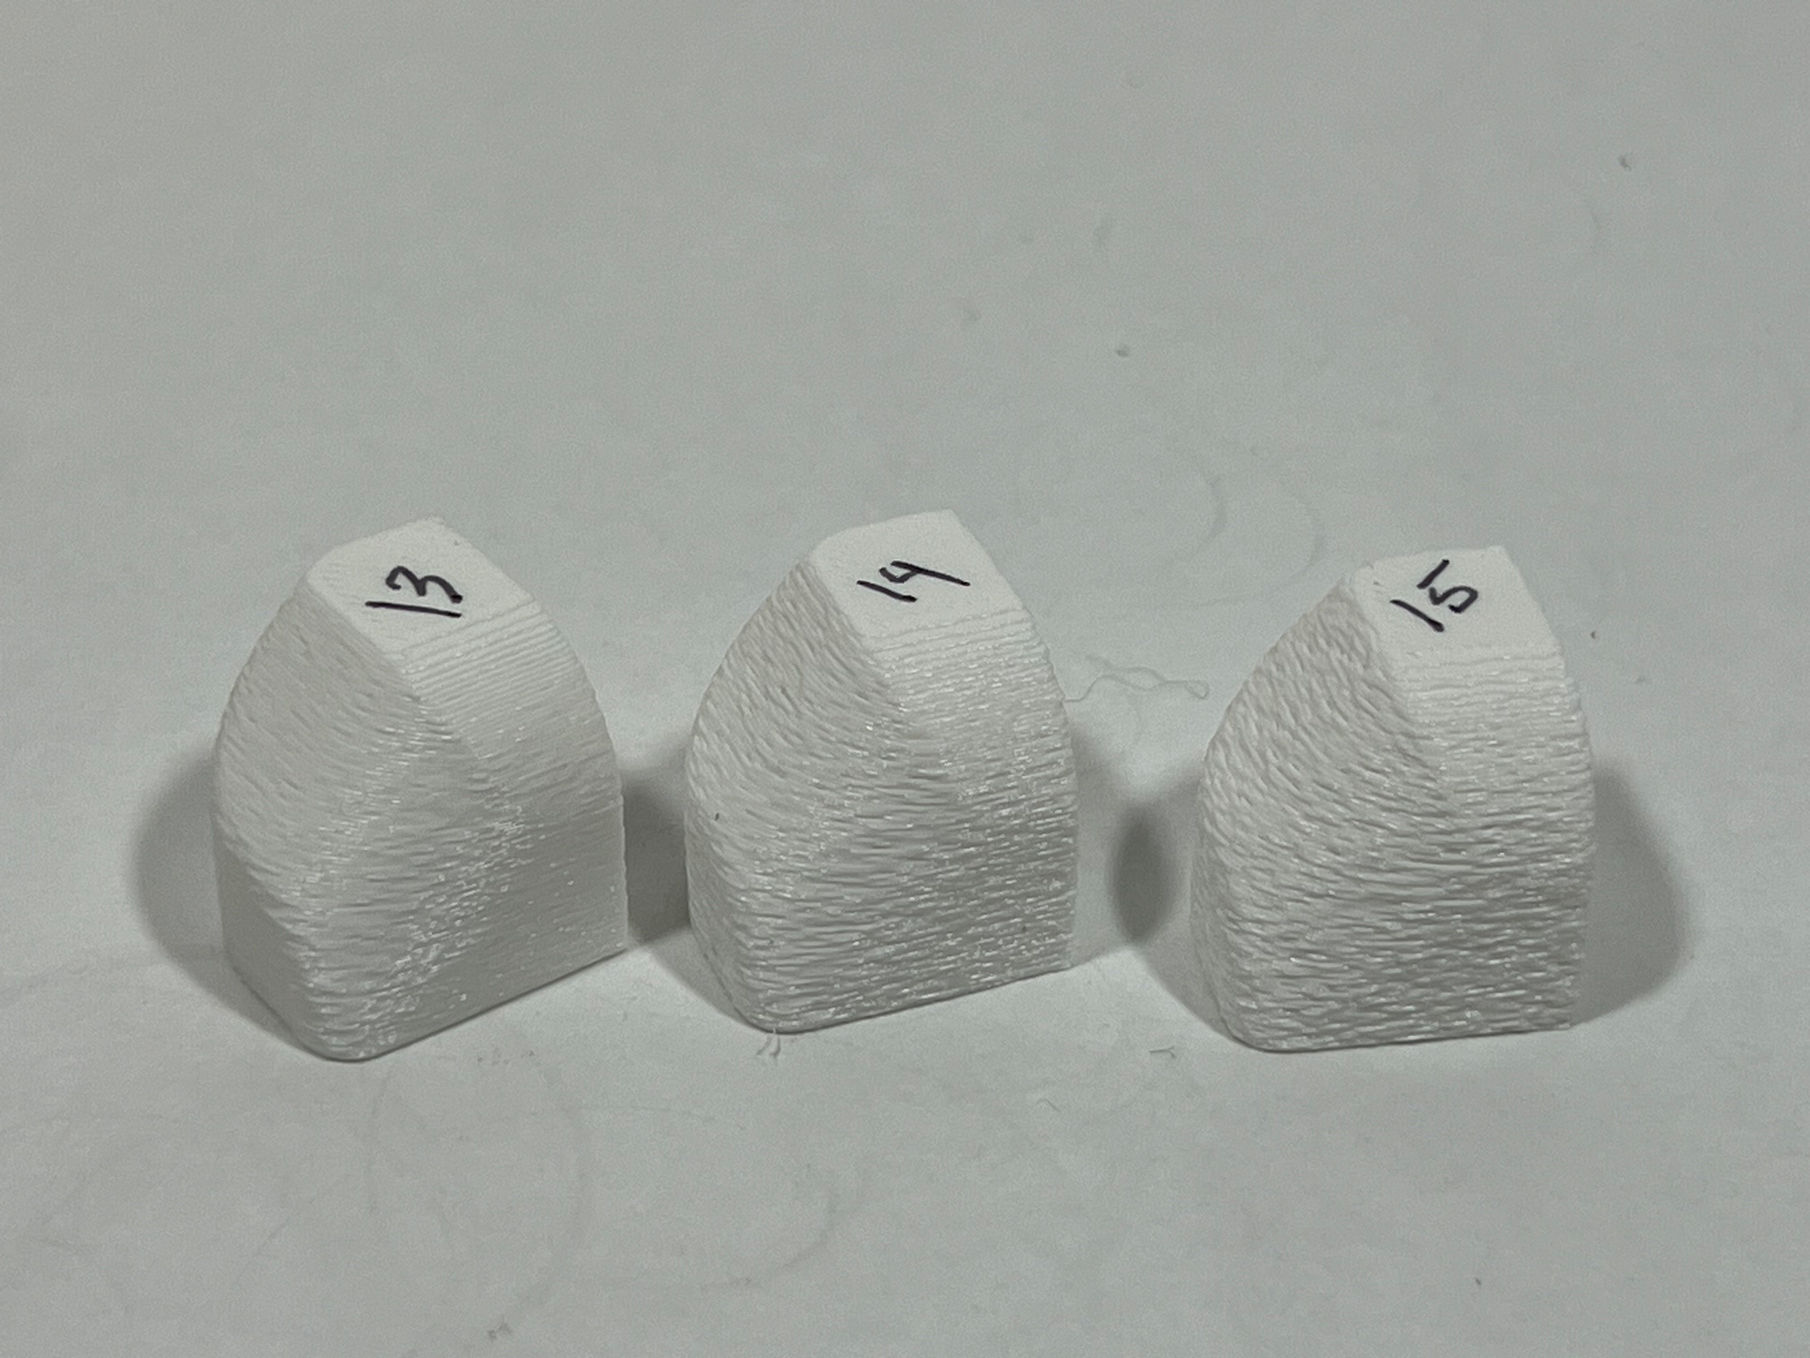
Part #13: Point Distance: 0.5, Thickness: 0.1
Part #14: Point Distance: 0.5, Thickness: 0.2
Part #15: Point Distance: 0.5, Thickness: 0.3
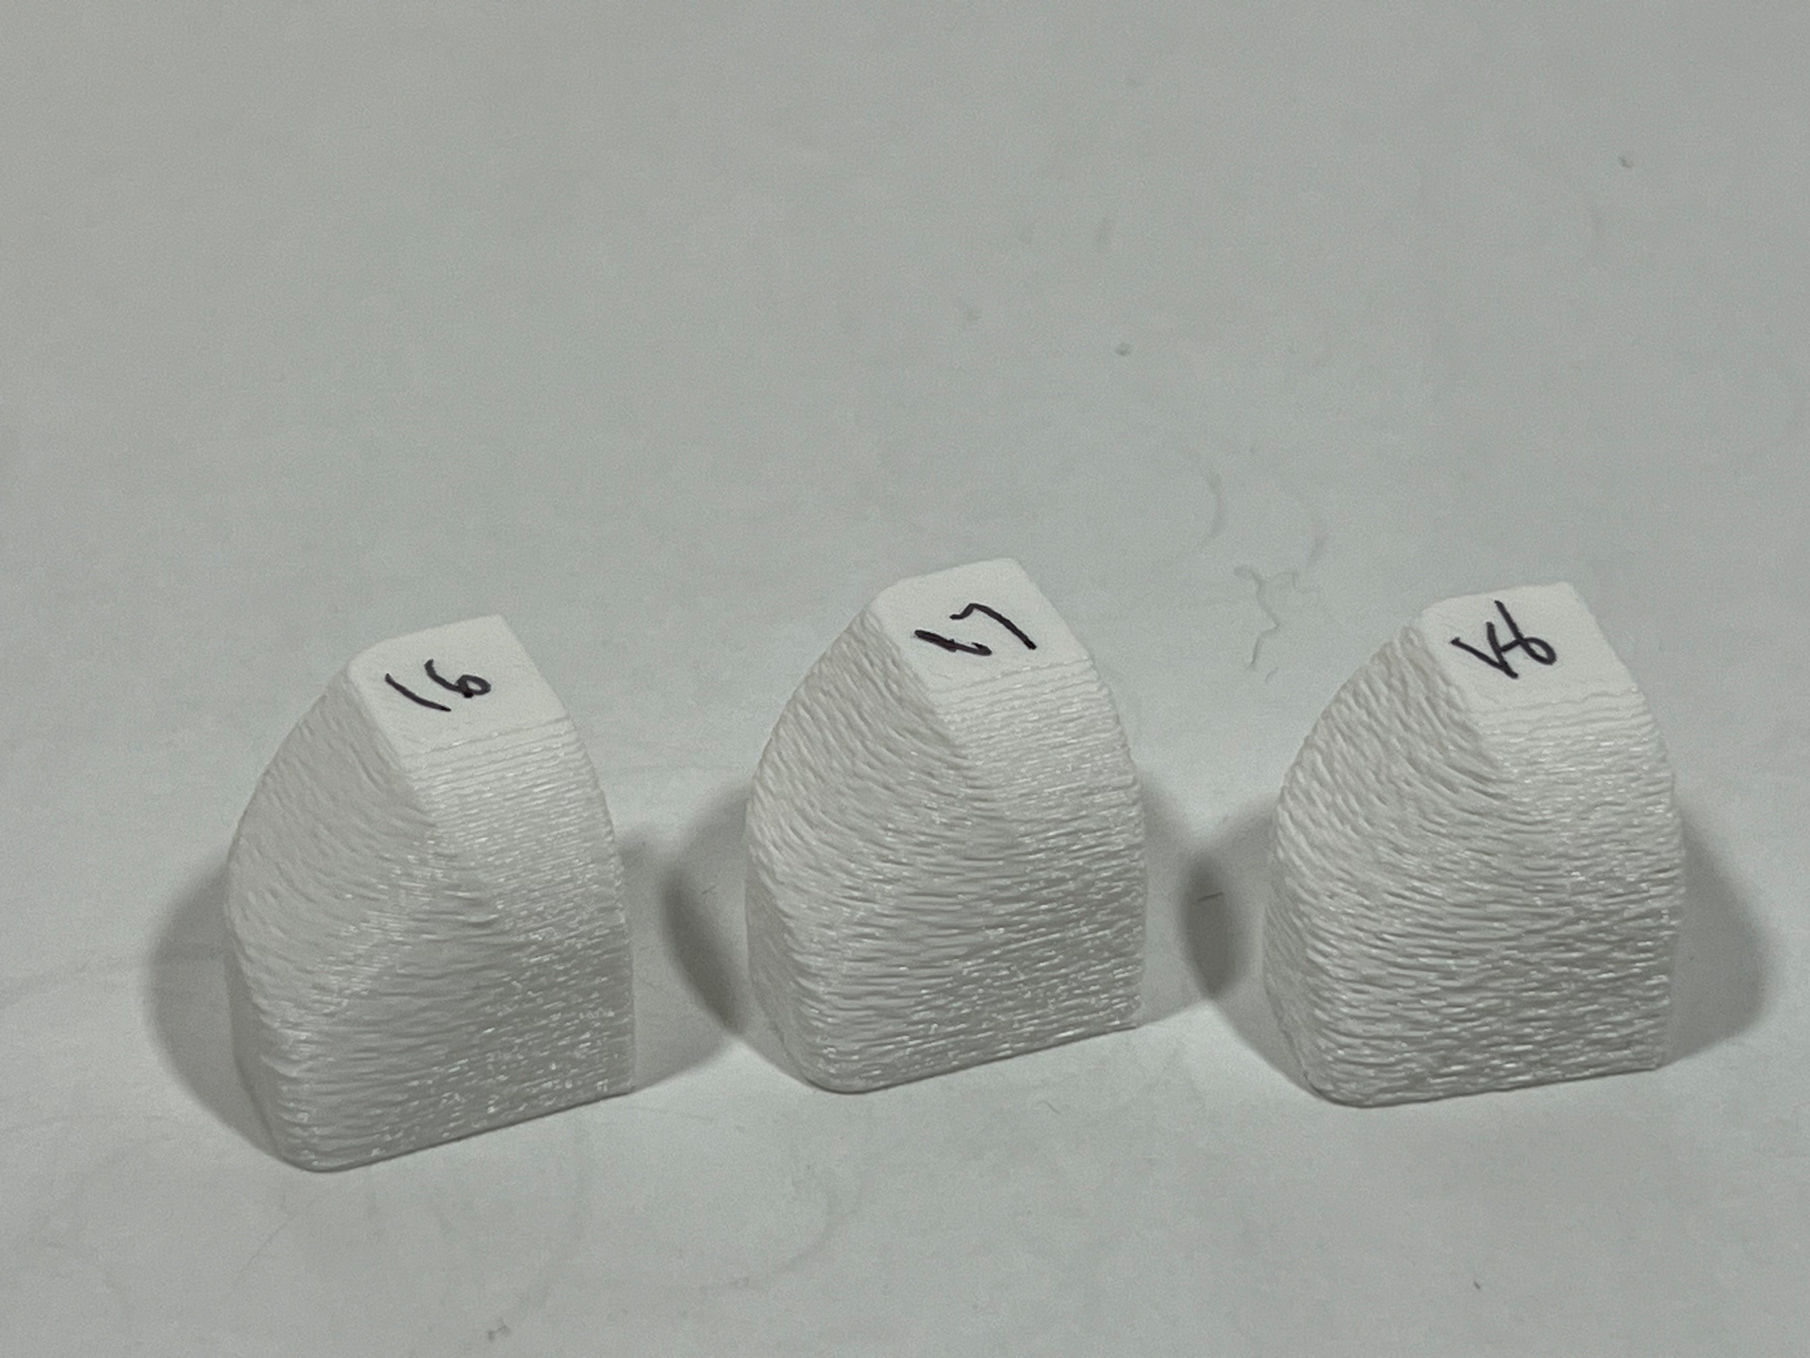
Part #16: Point Distance: 0.6, Thickness: 0.1
Part #17: Point Distance: 0.6, Thickness: 0.2
Part #18: Point Distance: 0.6, Thickness: 0.3
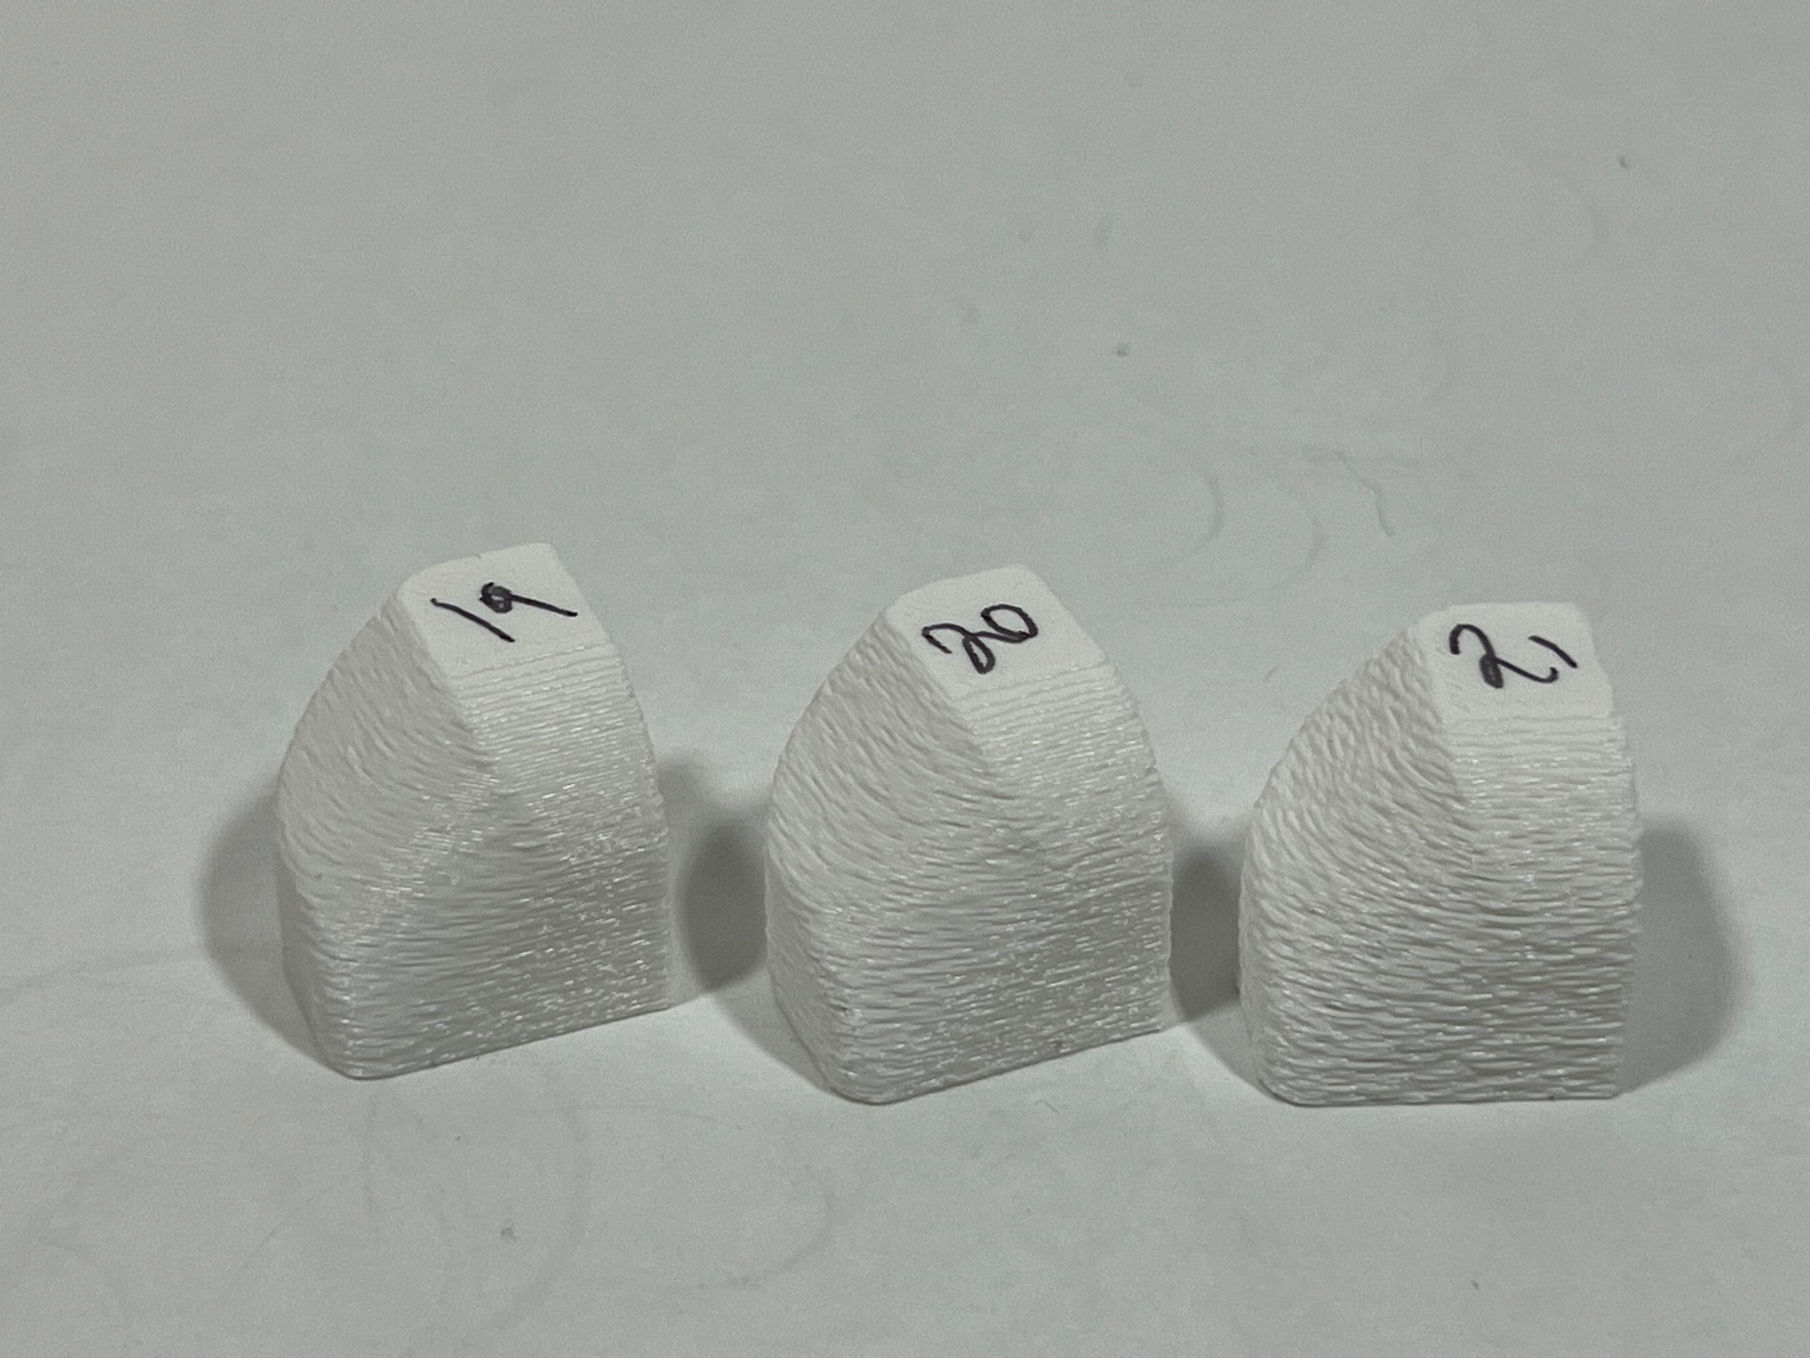
Part #19: Point Distance: 0.7, Thickness: 0.1
Part #20: Point Distance: 0.7, Thickness: 0.2
Part #21: Point Distance: 0.7, Thickness: 0.3

Part #22: Point Distance: 0.8, Thickness: 0.1
Part #23: Point Distance: 0.8, Thickness: 0.2
Part #24: Point Distance: 0.8, Thickness: 0.3
Enabling Fuzzy Skin
- Open Bambu Studio and load your 3D model.
- Go to the "Preview" page and click the "Others" tab.
- Scroll to the "Special mode" section and locate "Fuzzy Skin."
- Select a fuzzy skin option:
- None: No fuzzy skin applied.
- Contour: Applies fuzzy skin to outer walls only.
- Contour and Holes: Applies fuzzy skin to outer walls and internal holes.
- All Walls: Applies fuzzy skin to all walls (not recommended, as internal walls are hidden by infill).
- Adjust settings:
- Fuzzy Skin Point Distance: Sets the average distance between fuzz points (0.1–0.8 mm recommended).
- Fuzzy Skin Thickness: Sets how far the fuzz protrudes from the wall (0.1–0.3 mm recommended).
- Click "Slice Plate" to preview, then "Print" to start printing.
Using Modifiers to Limit Fuzzy Skin
- In Bambu Studio, load your model and go to the "Objects" tab.
- Add a modifier:
- Click the "Add Modifier" button (cube icon) in the toolbar.
- Choose a modifier shape (e.g., cube, cylinder) to cover the area where you want to prevent fuzzy skin.
- Position the modifier:
- Drag the modifier to overlap the specific part of the model where you want to disable fuzzy skin.
- Adjust the modifier’s size and position using the transform tools.
- Configure the modifier:
- In the object list, select the modifier.
- Go to the "Process" settings for the modifier.
- Disable "Fuzzy Skin" for the modifier (set to "None").
- Slice the model:
- Click "Slice Plate" to preview. The modifier’s overlapped area will exclude fuzzy skin, while other areas retain the fuzzy effect.
- Verify the result in the preview, then print.
Notes
- Recommended settings: 0.3 mm for both point distance and thickness for a balanced texture.
- Fuzzy skin increases print time and may affect tolerances for interlocking parts; adjust your model accordingly.
- Test settings on a small sample to find your preferred fuzz combination before printing larger models.